CALL NOW at your standard rate
122. the tools you need to fit laminate flooring

Everything You Need For Your Laminate Flooring Install

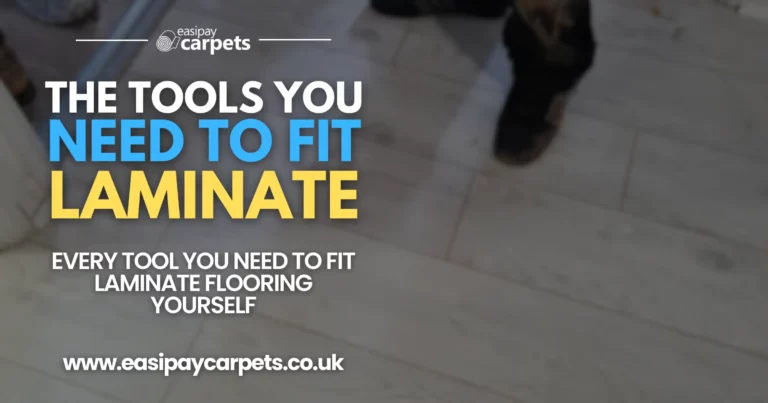
Laminate flooring is a popular choice for homeowners due to its affordability, durability, and stylish appearance. If you’re considering a DIY project and wondering, “What tools do I need to fit laminate flooring?” or whether “Is laminate flooring fitting easy?”, this guide will help you understand the process and the equipment required. With the right tools and some preparation, you can successfully install laminate flooring and transform your space.

Is Laminate Flooring Fitting Easy?

Yes, fitting laminate flooring can be relatively easy, especially for those with some DIY experience. Laminate flooring is designed with a click-lock system that allows the planks to snap together without the need for nails or glue. This floating floor method makes installation straightforward compared to traditional hardwood floors. However, having the right tools and following a methodical approach are crucial for achieving a professional-looking result.

Key Factors That Make Laminate Flooring Fitting Easy:

  1. Click-Lock System:
    Most laminate flooring comes with a click-lock system that allows the planks to snap together securely, simplifying the installation process.

  2. Minimal Tools Required:
    Unlike other types of flooring, laminate flooring doesn’t require specialised tools or adhesives, making it accessible for DIYers.

  3. No Need for Nails or Glue:
    Laminate flooring floats above the subfloor, so there’s no need to nail it down or glue it, reducing the mess and complexity of the installation.

  4. Easy to Cut and Shape:
    Laminate planks can be easily cut to size with a saw, allowing you to fit them around corners and obstacles without much hassle.

What Tools Do I Need to Fit Laminate Flooring?

To ensure a smooth and efficient installation, you’ll need a range of tools and equipment. Here’s a comprehensive list of the essential tools required to fit laminate flooring:

1. Measuring Tape

  • Purpose: To measure the length and width of the room and the laminate planks to ensure a precise fit.
  • Why It’s Important: Accurate measurements are crucial for avoiding mistakes and ensuring that your laminate planks fit together seamlessly.

2. Laminate Flooring Spacers

  • Purpose: To maintain an expansion gap between the laminate flooring and the walls.
  • Why It’s Important: Laminate flooring expands and contracts with temperature changes, so an expansion gap prevents buckling or warping.

3. Utility Knife

  • Purpose: To cut underlayment or score small cuts on the laminate planks.
  • Why It’s Important: A utility knife provides precise cuts and is handy for smaller trimming tasks.

4. Pull Bar

  • Purpose: To pull together the last rows of laminate planks near the wall where a tapping block cannot be used.
  • Why It’s Important: A pull bar helps fit the final rows tightly together, ensuring there are no gaps.

5. Tapping Block

  • Purpose: To tap the planks into place without damaging the edges.
  • Why It’s Important: A tapping block helps to join planks together securely while protecting their edges from being chipped or cracked.

6. Rubber Mallet

  • Purpose: To gently tap the tapping block and pull bar, ensuring the planks are snug without damaging them.
  • Why It’s Important: A rubber mallet is soft enough to prevent damage while providing the necessary force to join the planks.

7. Saw (Hand Saw, Circular Saw, or Jigsaw)

  • Purpose: To cut laminate planks to the desired size to fit around corners, doorways, and other obstacles.
  • Why It’s Important: Cutting the planks to size is essential for a precise fit and professional finish.

8. Carpenter’s Square

  • Purpose: To mark straight cuts on the planks and ensure corners are square.
  • Why It’s Important: Ensuring straight cuts and square corners is crucial for a seamless floor installation.

9. Underlay (Underlayment)

  • Purpose: To provide cushioning, soundproofing, and moisture resistance under the laminate flooring.
  • Why It’s Important: The underlay enhances comfort and protects the flooring from moisture damage.

10. Flooring Installation Kit

  • Purpose: A kit that typically includes a tapping block, pull bar, and spacers.
  • Why It’s Important: Having an all-in-one kit ensures you have the basic tools needed for installation without having to buy each item separately.

11. Safety Gear (Gloves, Goggles, Knee Pads)

  • Purpose: To protect your hands, eyes, and knees during installation.
  • Why It’s Important: Safety gear prevents injuries and allows you to work comfortably and efficiently.

12. Pencil or Marker

  • Purpose: To mark cutting lines on laminate planks.
  • Why It’s Important: Accurate markings are necessary for cutting the planks to the correct size and shape.

13. Moisture Barrier (if required)

  • Purpose: A moisture barrier is used in areas prone to moisture, such as basements, to protect the laminate flooring.
  • Why It’s Important: Protecting the flooring from moisture is crucial to prevent expansion, warping, and mould growth.

14. Hammer and Nails (Optional)

  • Purpose: For securing transition strips or baseboards after installing the laminate flooring.
  • Why It’s Important: Properly securing transition strips and baseboards provides a finished look to your floor.

Step-by-Step Guide to Fitting Laminate Flooring

With the right tools at hand, you’re ready to begin installing your laminate flooring. Here’s a step-by-step guide to help you through the process:

1. Prepare the Room

  • Step: Remove all furniture, carpets, and baseboards from the room. Ensure the subfloor is clean, dry, and level.
  • Why It’s Important: A clean and level subfloor ensures a smooth installation and prevents future problems like uneven flooring or squeaks.

2. Lay the Underlay

  • Step: Roll out the underlay and cut it to fit the room. Overlap the edges slightly and tape them together.
  • Why It’s Important: The underlay provides cushioning and soundproofing, and acts as a moisture barrier.

3. Acclimate the Laminate Planks

  • Step: Allow the laminate planks to acclimate to the room’s temperature and humidity for 48 hours.
  • Why It’s Important: Acclimating the planks prevents expansion or contraction after installation, ensuring a stable floor.

4. Start Laying the First Row

  • Step: Begin laying the first row of planks along the longest wall, using spacers to maintain the expansion gap. Cut the last plank to fit, leaving an expansion gap.
  • Why It’s Important: The first row sets the foundation for the rest of the flooring. A straight, well-spaced first row ensures a professional finish.

5. Install Remaining Rows

  • Step: Continue laying the planks row by row, using the tapping block and rubber mallet to click them into place. Stagger the seams by starting each row with the cut-off piece from the previous row.
  • Why It’s Important: Staggering the seams provides stability and a natural appearance.

6. Fit Planks Around Obstacles

  • Step: Measure and cut planks to fit around door frames, pipes, or other obstacles using a jigsaw or hand saw.
  • Why It’s Important: Accurate cuts ensure a snug fit and a polished look around obstacles.

7. Install the Last Row

  • Step: Use the pull bar to snugly fit the last row of planks against the wall, maintaining the expansion gap with spacers.
  • Why It’s Important: Properly fitting the last row completes the installation and prevents gaps or loose planks.

8. Remove Spacers and Install Trim

  • Step: Once all planks are installed, remove the spacers and install the baseboards or trim to cover the expansion gap.
  • Why It’s Important: Trim gives a finished look and protects the edges of the flooring.

9. Install Transition Strips (if necessary)

  • Step: Install transition strips where the laminate flooring meets other types of flooring or doorways.
  • Why It’s Important: Transition strips create a smooth transition between different flooring types and prevent tripping hazards.

DIY Laminate Flooring Installation Tips

  1. Work in Natural Light:
    Install laminate flooring in natural light to better see gaps, seams, and colour variations.

  2. Check Each Plank for Defects:
    Inspect each plank before installing it to ensure there are no defects or damage.

  3. Maintain a Clean Workspace:
    Keep the workspace clean and free of debris to prevent scratching the laminate surface during installation.

  4. Use a Sharp Blade for Cutting:
    Always use a sharp blade or saw for cutting planks to ensure clean, straight cuts.

  5. Measure Twice, Cut Once:
    Double-check measurements before cutting to avoid mistakes and waste.

Conclusion

Installing laminate flooring can be an easy and rewarding DIY project, especially with the right tools and preparation. Understanding what tools are needed to fit laminate flooring and following a step-by-step approach will help you achieve a professional-looking floor that enhances your home’s beauty and comfort. From measuring and cutting to fitting around obstacles and finishing with trim, each step is crucial for a successful installation.

With careful planning, attention to detail, and a bit of patience, you can transform your space with a beautiful, durable laminate floor that will last for years to come.

Easipay Carpets can help you get brand new flooring without the high up-front cost – by simply letting you spread the cost of the flooring over time instead. There’s no interest on our plans so you aren’t spending a penny more than you would buying it outright and we include underlay, door trims, carpet grippers and laminate beading for free. Prices start from just £10 per week! 

It starts with a free home appointment and quote, to get booked in at a time that suits you, tap the “Get Started” button below and fill out the contact form!

Still Got Questions? Here's 10 FAQs!

You need measuring tape, spacers, a utility knife, a pull bar, a tapping block, a rubber mallet, a saw, underlay, a carpenter’s square, and safety gear.

Yes, laminate flooring fitting is relatively easy due to its click-lock system, minimal tools required, and no need for nails or glue.

A moisture barrier is recommended in areas prone to moisture, like basements, to protect the laminate from expansion and damage.

Use a jigsaw or hand saw to cut laminate planks to fit around corners, door frames, pipes, or other obstacles.

Yes, laminate flooring can be installed over existing flooring like tiles or vinyl, as long as the surface is level, clean, and dry.

Spacers maintain an expansion gap between the laminate flooring and the walls to allow for natural expansion and contraction.

Yes, laminate flooring installation is a DIY-friendly project, especially with the right tools and preparation.

The installation time depends on the room size and complexity, but an average-sized room may take a day or two for a DIYer.

No, most laminate flooring is designed to float over the subfloor without glue. Glue may be used for transition strips or trim only.

Regularly sweep or vacuum with a soft brush, clean spills immediately, and use a damp mop with a mild cleaner to maintain your laminate flooring.

You Might Also Like...

About The Author

Pay Weekly Flooring From £10 Per Week!

• 0% Interest!
• No Credit Checks!
• Small Weekly Payments!
• Free Underlay!
• Free Door Trims!
• Free Carpet Grippers

Apply Easily Online For Your Pay Weekly Flooring Plan!